So, you’ve got a stunning website crafted with PracticeID, and now it’s time to take it live on your own domain. In this guide, we’ll walk you through the seamless process of connecting your PracticeID website to a domain registered through GoDaddy. Let’s make your online presence official!
Step 1: Access Your PracticeID Account
Log in to your PracticeID account where your website is created.
Step 2: Go to the Domain Section
Navigate to the ‘Domain’ section of your PracticeID account.
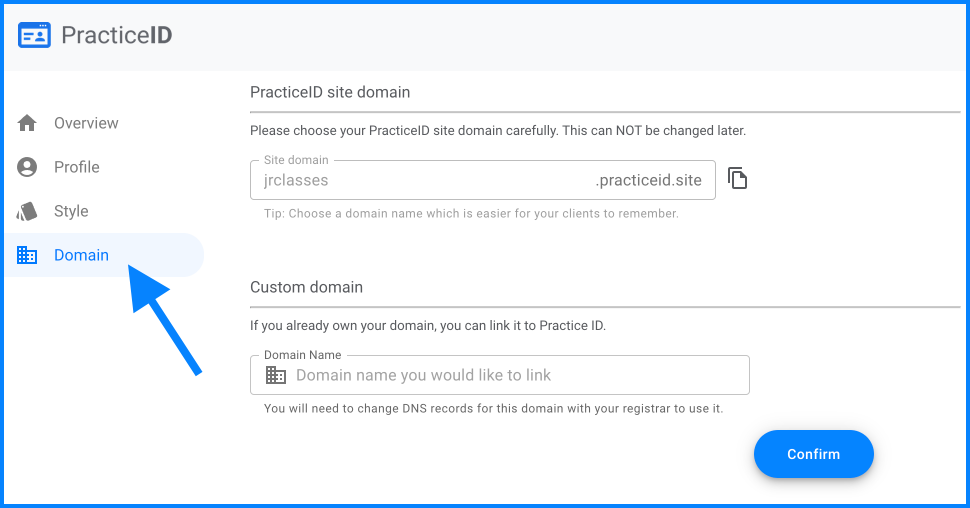
Step 3: Enter the “Custom Domain”
Simply enter the domain name you own and you would like to link in the Custom Domain sub-section.
If you don’t own a Custom Domain. You can buy one using any reputed registrar like GoDaddy.

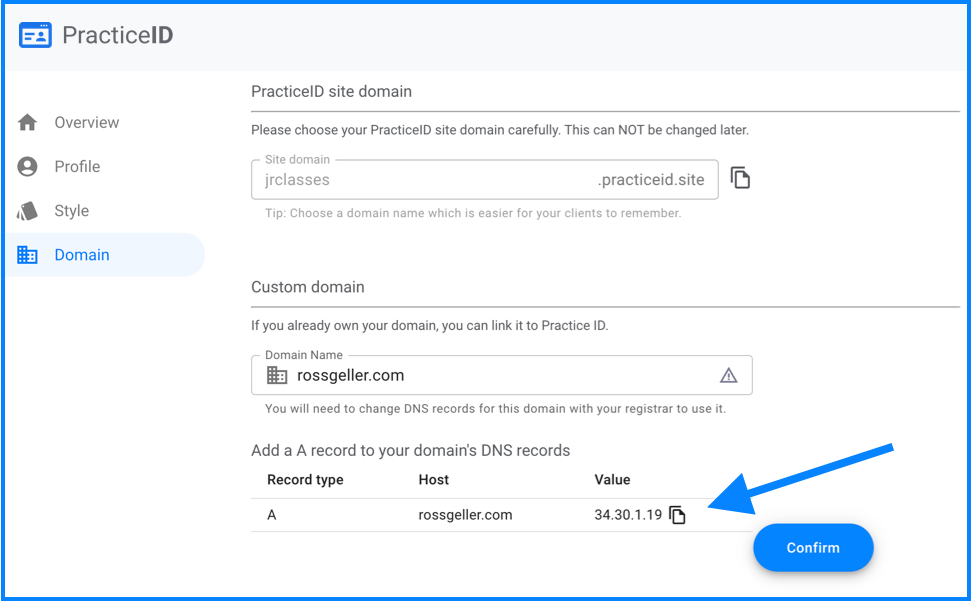
Step 4: Copy the DNS Settings
Once you hit confirm, you will be able to see the DNS records.
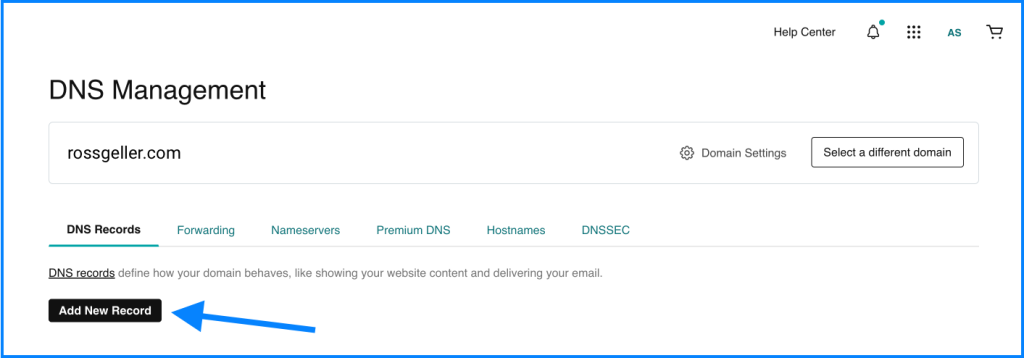
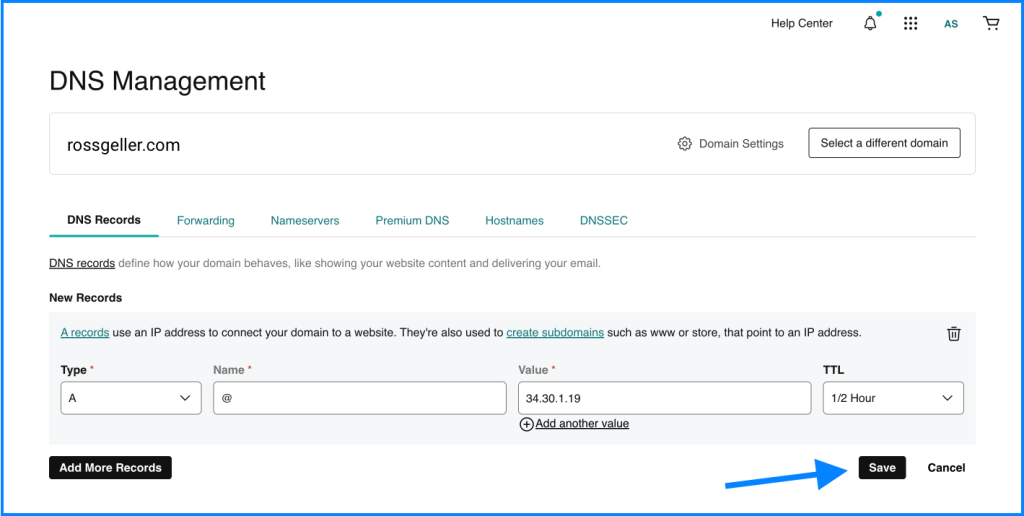
Step 5: Configure DNS Settings
Go to your domain registrar (like GoDaddy or Hostinger) and access the DNS settings of the domain. Add/Update the DNS records.
Step 6: Wait for DNS Propagation
- Changes to DNS settings might take some time to propagate across the internet. Be patient and wait for this process to complete. You can open your website in browser after sometime and it should be up and running.
Congratulations! Your PracticeID website is now live on your very own domain. Your professional online presence is ready to make an impact. Keep exploring the possibilities and maximizing the potential of your digital identity.